Master Your Weird: A No-Nonsense Guide to DIY Mastering for Experimental Electronic Music
Photo: LiquidMolly, CC BY-SA 2.0, via Wikimedia Commons
Let's be real about something: the conventional mastering industry wasn't exactly built with noise collage, microtonal drone, or glitch-heavy club edits in mind. A lot of the loudness targets, tonal benchmarks, and "reference track" logic that professional mastering engineers rely on assumes a certain kind of music — music with identifiable dynamics, recognizable frequency distributions, and an audience that expects some version of polish.
Experimental electronic music frequently wants none of that. And yet it still needs to sound intentional, translate across playback systems, and hold up against whatever else ends up on the playlist. That's where DIY mastering comes in — not as a compromise, but as a genuine creative advantage.
Why Experimental Music Needs a Different Mastering Approach
Conventional mastering wisdom is largely built around correcting problems: taming harsh high-mids, evening out the low end, controlling dynamic range to sit comfortably in a streaming context. For pop, rock, or even most electronic dance music, those goals make sense.
But if your track is supposed to be harsh, or deliberately dynamic, or structured in a way that defies the loudness normalization algorithms on Spotify and Apple Music — standard mastering advice can actively work against you. You don't want an engineer reflexively pulling out a multiband compressor to "fix" the frequency imbalances that are the entire artistic point of the piece.
DIY mastering lets you stay in control of those decisions. It's slower and requires more learning, but for genuinely unconventional music, the results often beat what you'd get from handing your stems to someone who's never encountered your genre.
Building Your Room First
Before you spend a dollar on gear, spend time on your room. This is the piece of advice that every mastering guide repeats because it remains stubbornly true: the most expensive monitoring chain in the world is useless if your room is lying to you about what you're hearing.
You don't need to build an acoustically treated professional space. But you do need to understand your room's problems. Download REW (Room EQ Wizard — it's free), grab an inexpensive measurement microphone like the Dayton Audio iMM-6 (around $20), and run some measurements. You'll quickly see where your room is hyping or swallowing frequencies, and you can start making informed decisions about where to place acoustic treatment.
Basic acoustic panels made from Rockwool or Owens Corning 703 rigid fiberglass, in simple wood frames, can be built for well under $200 and make a dramatic difference in early reflection control. Corner bass traps — floor-to-ceiling stacks of the same material — address the low-frequency buildup that plagues almost every small room. This isn't glamorous work, but it pays off more than any plugin.
Monitor Choices for the Budget-Conscious Eccentric
For experimental music, you arguably need monitoring that extends further into both frequency extremes than a standard nearfield pair provides. Tracks with significant sub-bass content, extended high-frequency noise, or unusual spatial characteristics will reveal themselves differently on different systems.
A practical approach used by many independent producers: a pair of reliable nearfields plus a secondary reference. For primary monitors, the Yamaha HS5 or HS7 series remain workhorses in the sub-$400-per-pair range and are deliberately flat enough to catch problems without flattering your mix. The Adam Audio T5V is another strong option with slightly better high-frequency extension.
For secondary reference, don't overlook headphones. The Sennheiser HD 650 (or the more affordable HD 600) gives you a different perspective on stereo width and transient detail that complements speaker monitoring well. Switching between the two during mastering sessions reveals inconsistencies that neither alone would catch.
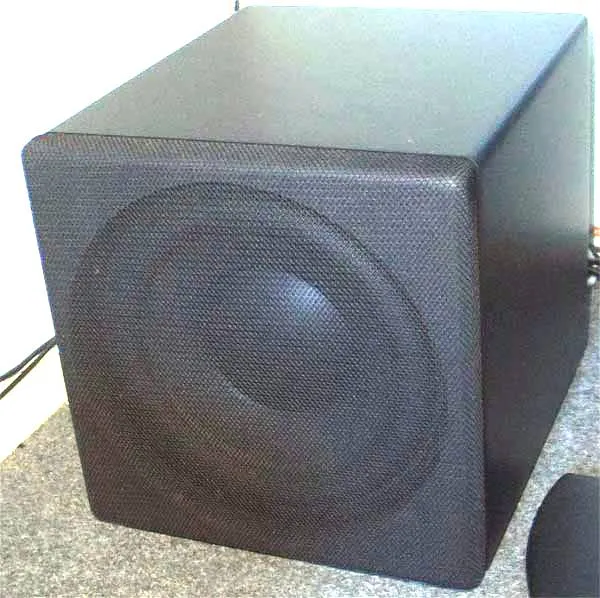
If your music has significant sub-bass content — and a lot of experimental electronic music does — adding a small subwoofer like the KRK 10S2 to your monitoring chain, carefully calibrated with REW, helps you make better-informed decisions in the sub-60 Hz range.
Essential Software for the DIY Mastering Chain
The good news: you probably already have more mastering tools than you think. Most DAWs include capable EQ and compression that's entirely serviceable for mastering. But a few specialized tools are worth the investment.
iZotope Ozone is the closest thing to an industry standard for home mastering, and the lower-tier versions (Ozone Elements or Standard) are frequently on sale for under $100. Its built-in spectrum analyzer, stereo imager, and limiter are all genuinely useful. The AI-assisted "Master Assistant" feature is worth trying as a starting point, even if you'll override most of its suggestions.
SPAN by Voxengo is a free spectrum analyzer plugin that should be in every mastering session. For experimental music especially, watching your frequency distribution in real time while making decisions is invaluable.
Bitter by Stillwell Audio (also free) is a bit-depth analyzer that helps you catch clipping and digital artifacts — a real concern when you're working with distorted, saturated, or heavily processed experimental material that might be generating peaks you're not hearing.
For limiting, the stock limiter in your DAW is probably fine to start, but Limiter No6 by Tokyo Dawn Labs is a free, professional-grade option worth exploring. For music that's supposed to be loud and aggressive, Clipper plugins — which use soft clipping rather than limiting — often sound more natural on dense, complex material.
Common Pitfalls Specific to Experimental Audio
A few traps that catch experimental producers more than most:
Over-correcting for loudness targets. Streaming platforms normalize playback, which means mastering to extreme loudness levels actively damages your dynamics for no gain. Aim for an integrated loudness of around -14 LUFS for most streaming contexts, and don't fight it. If your music is dynamic by design, let it be dynamic.
Treating DC offset as a problem to hide. Some experimental synthesis techniques generate DC offset — a constant voltage shift that eats headroom and can cause problems downstream. A simple high-pass filter at 20 Hz (or even 30 Hz) at the start of your mastering chain eliminates this cleanly without affecting audible content.
Mistrusting your own ears. Experimental music often sounds "wrong" by conventional standards — that's the point. The trap is second-guessing intentional choices because they don't match reference tracks or loudness presets. Trust your vision. Use technical tools to ensure the execution is clean, not to sand off the edges.
Case Studies From the Underground
Labels like Hausu Mountain (Chicago) and NNA Tapes (Vermont) have built reputations for releasing genuinely strange, carefully produced experimental work on modest budgets. Both have spoken publicly about the importance of producers and label operators developing their own mastering literacy rather than outsourcing it entirely.
The consistent thread: investment in room treatment and monitoring comes first, software comes second, and conventional mastering wisdom comes last — filtered heavily through the specific needs of the music. That philosophy has produced some of the most sonically distinctive releases in American experimental music over the past decade.
Starting Small, Thinking Long
You don't need to build the full chain at once. Start with room treatment, a reliable pair of monitors, and a spectrum analyzer. Master your first record. Notice what you got wrong. Fix it on the next one. The learning curve is real, but it's a curve that bends toward genuine creative ownership — and for music this far outside the mainstream, that ownership matters more than almost anything else.
Your weird deserves a careful hand. Might as well be yours.